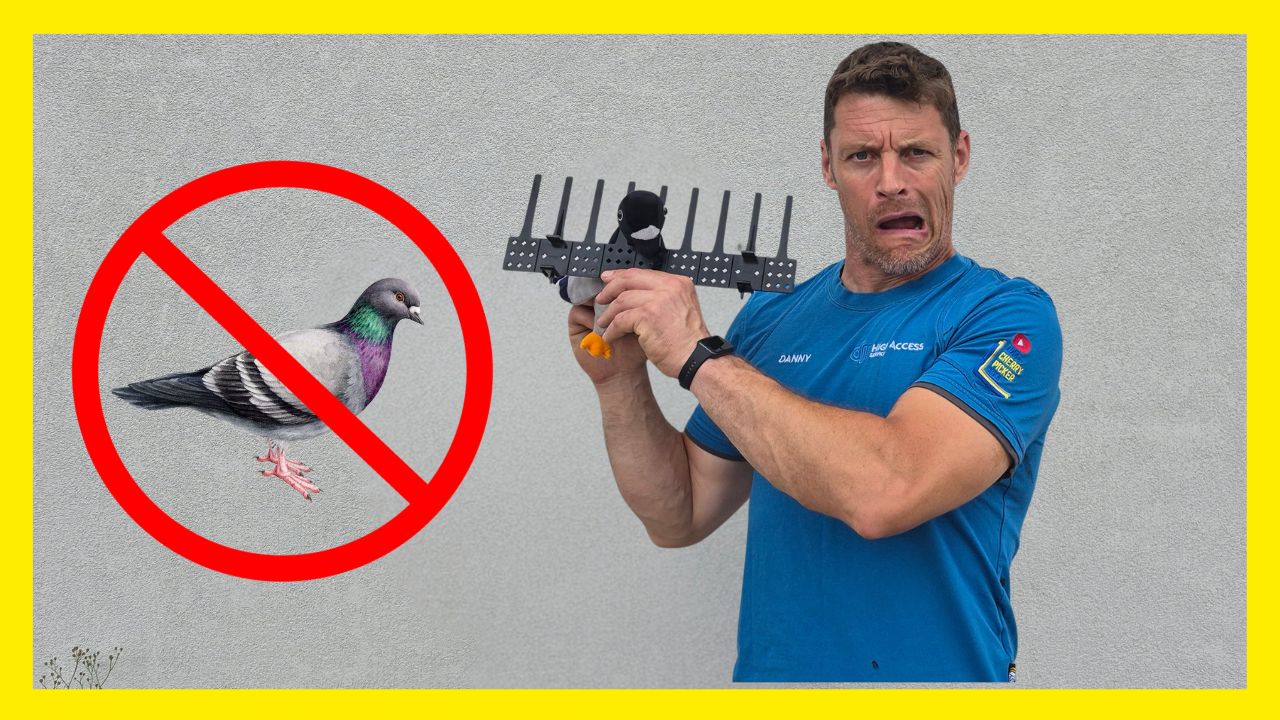
If you’ve never had pigeons nesting under your solar panels, consider yourself lucky. Once they find that gap between the panel and the roof, they move in, they nest, and they make an absolute mess. Guano all over your cables, nesting material blocking the airflow under the panels, and a real headache for your solar system’s performance. It’s one of those problems that’s significantly easier to prevent than it is to fix after the fact — and that’s exactly why I decided to put the Defender Jaws solar panel bird excluders to a proper real-world test.
A few weeks back, Defender Bird Spikes sent me a sample box from their online shop. I was particularly impressed by the Jaws excluders, so I got back in touch and asked whether they’d supply enough to do my own house, in exchange for an honest video review. They agreed, I filmed it, and here’s what I found.
👉 Watch the full install and review here: https://youtu.be/yvBtF8cos4c
What Are the Defender Jaws Solar Panel Bird Excluders?
The Defender Jaws system is made by Defender Bird Spikes, a family-run business based in Devon. What sets these apart from the mesh and clip systems I’ve used and documented in previous videos is the design philosophy: there are no separate clips, and no mesh to wrestle with.
Each strip is a single moulded piece of UV stabilised black polycarbonate that clips directly onto the edge of the solar panel frame using integral jaws built into the back of the strip. Before anyone mentions it going brittle in the sun these are UV stabilised polycarbonate with a 15-year warranty. Like the gutters around your roofline, they’re designed to last.
They’re made to fit the two most common solar panel frame depths in the UK: 30mm and 35mm. The strip is reversible one side fits 30mm, flip it over and it fits 35mm. Each strip is just over 13 inches long, and if you need to cut one to size, there are nine pre-marked sections with cut lines already moulded in. Clean, simple, well thought out.
You can find the full product range at www.birdspikesonline.co.uk.
The Installation — What Worked Well
Access for this job was via my cherry picker, which makes solar panel bird proofing significantly more manageable than attempting it from a ladder. I started along the back edge of the panels and worked clockwise around the array.
I’ll be straight with you the first few strips along the back edge felt stiff and fiddly. I was trying to push them straight onto the panel frame and they weren’t going on as easily as expected. By the time I’d worked my way around to the first side, I’d figured something out that made a real difference.
The trick and this isn’t in the instructions is to squeeze the lugs on the back of the strip together. The two jaws you’re not using — squeeze those, and it significantly opens the two jaws you’re clipping onto the panel. Instead of forcing it, you can use the strip almost like a peg. Position it, release, and it clips on cleanly and quickly. Once I’d worked that out, installation speed increased dramatically. If you’re fitting these for the first time and struggling, try that first.
My solar panel setup isn’t a straightforward rectangl,e I’ve got four panels lower down and two higher up, which means more corners, more cutting, and more thinking. The modular nature of these strips handled that well. You cut to fit, work your way around, and as long as the perimeter is sealed with no gaps, you’re on the right track.
Defender are clear on one key measurement: no gap along the bottom edge should exceed 50mm between the tip of the prongs and the roof tile. Any bigger than that, and a pigeon can get through. They also include a small 50mm polystyrene ball in the pack so you can physically check for gaps. If the ball fits through, a pigeon can too. Simple, but genuinely clever.
This kind of job is exactly the sort of work I carry out across the Midlands as part of my bird mesh installation service and having the right access equipment makes all the difference to the quality of the finished result.
Where It Gets Fiddly, An Honest Criticism
This is an honest review, so here’s the part that didn’t go as smoothly.
Where the mounting rails the rails the solar panels actually sit on protrude beyond the edge of the array, you can’t clip a standard strip on in the normal way. The rail blocks it. The workaround is to cut a section of strip, flip it upside down, slide it under the rail, and glue the prongs either side of the rail using hybrid polymer adhesive to hold it in position.
It works. But compared to the rest of the installation which is clean, satisfying, and almost entirely clip-on this section felt clumsy. You’re reaching for the adhesive when the rest of the job barely needed it.
To be fair, this was my first install with this system, and I’d expect to find a neater approach with experience. But if Defender are reading this a dedicated solution for that rail section would make an already strong product even better. Something that clips onto the bottom of the rail, or bridges over it cleanly, without the need for cutting and adhesive. The rest of the system is slick enough that this section stands out as the weak link.
One other thing worth flagging, particularly if you’re a contractor rather than a homeowner doing your own panels: the Defender Jaws are designed for 30mm and 35mm panel frames, which covers the vast majority of modern solar installations in the UK. But if you turn up to a job and the panels are outside that range, they won’t clip on as intended. You can work around it with adhesive, but anything bonded that way becomes a pain to remove if you ever need to get back in. For a contractor who doesn’t always measure panel thicknesses before pricing a job and let’s be honest, getting access equipment out just to measure a frame before you’ve even quoted isn’t always practical it’s a small but real consideration.
👉 See exactly how I handled all of this in the video: https://youtu.be/yvBtF8cos4c
The Finished Result
With everything fitted, the first thing that strikes you is how tidy it looks. The black polycarbonate sits neatly against the panel frame and from ground level it blends in as though it’s part of the array itself. There’s also an option to attach Defender Thistle spike strips along the top of the Jaws guards if you’ve got birds perching along the top edge of your panels each strip has two small posts on top designed specifically for that. A nice touch that lets you upgrade the protection without touching the panels.
Overall verdict: genuinely one of the quickest and neatest solar panel bird proofing solutions I’ve come across. Easier than mesh, better looking than most clip systems, and once you’ve got that peg technique sussed, they go on fast. The 15-year warranty and UV stabilised polycarbonate means you’re buying something built to last and at the price point, that’s solid value.
British-designed, British-made, by a family business in Devon. Always something I can get behind.
Thinking About Bird Proofing Your Own Roof?
Solar panel bird proofing is just one part of what I do. Whether you’re dealing with pigeon problems, need a full roof condition survey to find out what’s going on up there, or you’ve got roof repairs or chimney maintenance that need sorting, I work across the Midlands using cherry picker access — which means no scaffolding, no mess, and a proper look at the problem before any work starts.
Get in touch via the website if you want to discuss a job.
Frequently Asked Questions
How do I stop pigeons nesting under my solar panels?
The most effective solution is to fit a solar panel bird exclusion system around the full perimeter of your panel array, sealing the gap between the panel edge and the roof. Products like the Defender Jaws excluders clip directly onto the panel frame without the need for mesh or separate fixings. The key is ensuring no gap exceeds 50mm along the bottom edge — anything larger and pigeons can still get through. For a professional installation, take a look at my bird mesh installation service.
Are solar panel bird guards worth fitting?
Yes particularly as a preventative measure. Once pigeons nest under solar panels they rarely leave on their own, and the resulting guano and nesting debris can affect cable condition and restrict the airflow that helps keep panels cool and efficient. Fitting bird excluders before the problem starts is far less costly than dealing with a full nest clearance and clean-up afterwards.
Can solar panel bird proofing be done from a ladder?
Technically yes, but it’s significantly more difficult particularly on awkward roof pitches, panels set back from the edge, or arrays with multiple sections. Cherry picker access allows you to work along the full perimeter of the array safely and at a comfortable working position, which makes for a faster and neater result. You can find out more about cherry picker access for roofing work here.
What size solar panel frames do the Defender Jaws fit?
The Defender Jaws excluders are designed to fit 30mm and 35mm panel frames the two most common depths used in UK domestic solar installations. The strips are reversible, so one side fits 30mm and the other fits 35mm. If your panels fall outside this range, a mesh-based system using universal clips may be a more suitable option.
How long do solar panel bird guards last?
The Defender Jaws strips are made from UV stabilised polycarbonate and carry a 15-year warranty. UV stabilised materials are specifically formulated to resist degradation from sunlight exposure similar to the material used in roofline guttering so brittleness over time shouldn’t be a concern under normal conditions.
Do I need to remove solar panel bird guards for maintenance?
In most cases, no. The clip-on design of systems like the Defender Jaws means they can be removed and refitted without damaging the panel frame. The exception is where adhesive has been used for example at cut ends or around mounting rails — where removal is more involved. It’s worth bearing this in mind if your panels are likely to need inverter or cable access in future.
Follow Me Online
- 🌐 Website: www.dji-uk.co.uk
- 🎥 YouTube: @dan_cherrypicker_man
- 🎵 TikTok: @dan_cherrypicker_man
- 📸 Instagram: @dan_cherrypicker_man
- 👍 Facebook: Dan the Cherry Picker Man
- ⭐ Google Business Page: DJI High Access Services
- 🛒 Amazon Shop: amazon.co.uk/shop/danthecherrypickerman
👕 My workwear is sponsored by Granite Workwear, and all of the clothing I’m wearing in the video can be purchased on their website: www.graniteworkwear.com?afid=danny