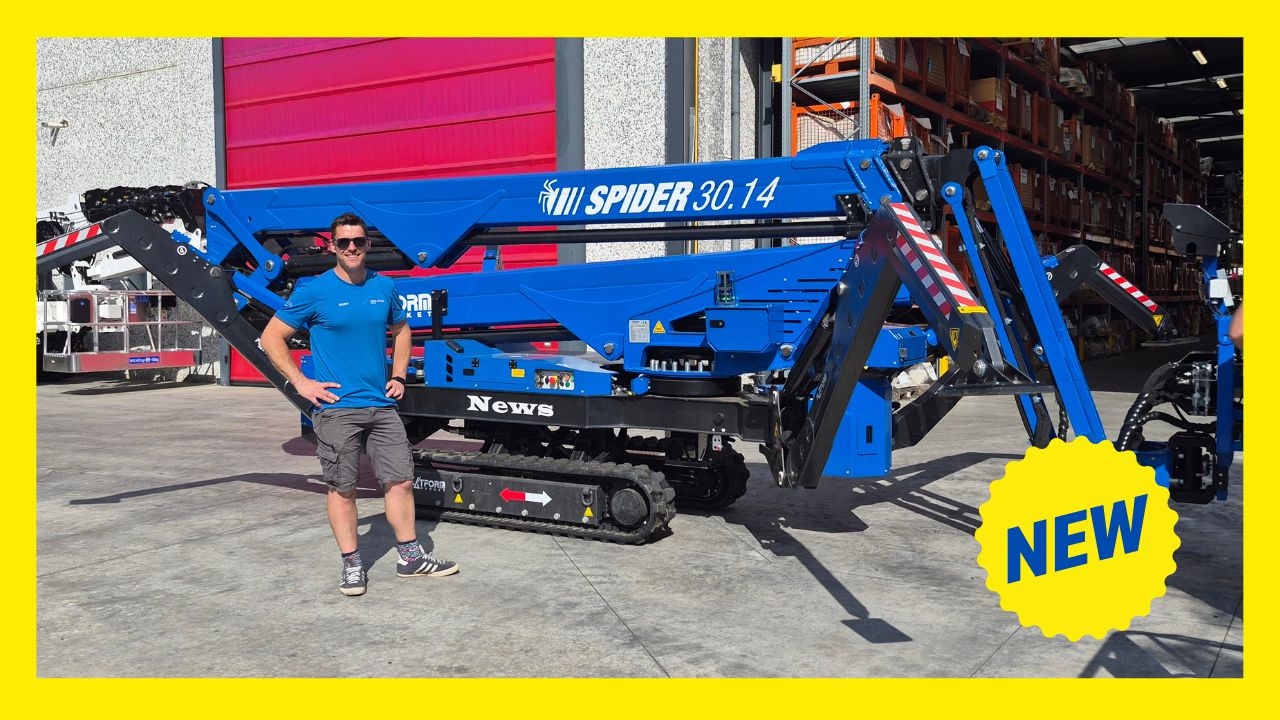
With Tom Heasman of Elite Access Ltd and Danny Iwanejko of DJI High Access Services Ltd
(Based on the full walk-through in – The FULL Unedited Guide to Buying a Used Cherry Picker (Expert Advice Inside)
Step 1 – Be Crystal Clear on What You Actually Need
Before you even look at machines:
- What jobs do you do most?
- Chimneys and roofs?
- Tree work?
- Building cleaning or cladding?
- Do you need:
- Outreach more than pure height?
- Up-and-over capability?
- A narrow machine for tight access?
- Will it be just you and the machine, or part of a rental fleet?
The right spider is the one that does 90% of your work well, not some mythical “perfect machine”. The video chat in The FULL Unedited Guide to Buying a Used Cherry Picker is very honest about this point: there is no one machine that does everything.
Step 2 – Decide Budget and Factor in Hidden Costs
Don’t just think “machine price”.
You must also allow for:
- Transport (trailer, towing vehicle, delivery)
- LOLER/Thorough examination costs
- Big-ticket wear items:
- Slew bearing (can be tens of thousands on some machines)
- Chains or ropes in the telescopic boom
- Hoses, pins and bushes, engine work
A “cheap” £15k machine can very quickly become a £20k machine once you do what should have been done years ago.
Step 3 – Brands, Popularity and “Name Bias”
In the video (A buyers guide to second hand cherrypickers), Tom explains how certain names (like Hinowa in the UK) have become the default.
Key points:
- Rental fleets love simple, proven machines – that’s why you see so many of the same brand.
- Just because “everyone runs one” doesn’t mean it’s the best machine for your work.
- Other manufacturers (Easy Lift, Platform Basket, Multitel, Palazzani, etc.) may offer:
- Better outreach
- Better access geometry
- Features more suited to your niche
Don’t buy a model just because it’s the name customers recognise. Buy what actually fits your job list.
Step 4 – Check Age, Hours and Paperwork
Before you go and fall in love with the paint:
- How old is the machine?
- How many hours has it done?
- Has it got:
- Recent LOLER?
- Service records?
- Any major component replacements (slew, ropes, chains)?
Request photos of logbooks and LOLER reports in advance. If you’ve watched the breakdown in A buyers guide to second hand cherrypickers, you’ll know that these documents also give you clues about how serious the owner is about maintenance.
Step 5 – Pre-Check for Chains/Ropes and Major Inspections
Different manufacturers specify that:
- Chains must be inspected or fully checked at certain age/intervals.
- Wire ropes often have a hard replacement interval (e.g. 7, 10 or 12 years).
Before viewing:
- Call the UK dealer or manufacturer.
- Give them the model and serial number.
- Ask:
- “At what age do the ropes/chains need replacing or a full inspection?”
- “Does this particular machine show as having had them done?”
If ropes are due and you’re looking at a £30k machine that needs a £4–5k rope job, that’s either a negotiation point or a reason not to bother travelling.
Step 6 – Decide Who You Want to Buy From
You broadly have two routes:
- Reputable dealer / access specialist
- Knows the machines inside out
- Can show you what’s been done
- Can walk you through emergency lowering and quirks
- Private seller / eBay / random plant trader
- Often cheaper upfront
- Much higher risk if you’re going in blind
The advice in A buyers guide to second hand cherrypickers is clear:
If you’re new to spiders, 90% of the time, buy from a proper dealer.
If you do buy privately, be twice as picky and consider taking an engineer with you.
Step 7 – Start Your Inspection from the Bottom Up
Tom’s golden rule: never start in the cage.
Always check from the ground up so you don’t send yourself up in something that has a fundamental structural or tracking problem.
Step 8 – Inspect the Tracks and Undercarriage
Look at:
- Track condition
- Deep splits?
- Clear signs the cords/steel inside are exposed?
- Tension
- Not hanging loose like a wet bit of spaghetti
- Wear and abuse
- Signs the tracks have been on and off hundreds of times
- Missing or damaged pads
A split or thrown track on site is expensive and embarrassing.
Step 9 – Track Tensioners and Grease
Many spiders use a greased hydraulic tensioner:
- Find the grease point and tensioner behind its cover.
- If the track is loose but there’s grease everywhere, ask:
- Is it just messy greasing?
- Or is it leaking because seals or fittings are failing?
It might be a simple loose nipple, or it might mean the tensioner is on its way out. It’s a small detail that tells you a lot about how the machine’s been treated.
Step 10 – Expanding Tracks: Check They Move
For machines with in/out expanding tracks:
- Check the channels/tubes they slide in:
- Rusty?
- Scarred, gouged, or dry?
- Ask the seller to:
- Drive the tracks in and out fully
- Show that they move freely, not in juddery, half-stuck motions
On neglected machines, the track frames can corrode solid, sometimes needing serious hydraulic persuasion to free them. That’s your problem once you own it.
Step 11 – Track Brackets and Rough Use
Some machines have tracks mounted on brackets rather than directly on the chassis.
- Look for bent brackets, cracked welds, or anything out of square.
- Bent brackets usually mean impact or overload and can be an expensive fix.
Step 12 – Hydraulics Under the Tracks
Under and around the tracks you’ll generally find:
- Drive motors
- Hoses for:
- Tracking
- Track in/out
- Sometimes leg functions
Check for:
- Oil leaks – wet patches around fittings and motors
- Hose chafing – any spots where the outer rubber is worn away or metal braiding is visible
- Motors that look abused or dripping
You can later change the gear oil in the motors once you own it, but for buying, you’re looking for signs it hasn’t been neglected.
Step 13 – Hoses Everywhere You Can See Them
As you move around the base:
- Follow any hoses you can see:
- Are they secured properly?
- Are they rubbing on sharp corners or steel edges?
- Is the rubber covering intact, or is the metal braiding exposed?
Exposed braiding rusts and corrodes, and eventually the hose bursts, usually in the most awkward possible position.
Step 14 – Sheathing and Protection
Some machines (like your Platform Basket) use sleeving where hoses enter the boom:
- This is a good thing – it protects from:
- UV and weather
- Dropped tools and debris
- General abrasion
If one machine has lovely protected runs and another has hoses flapping around bare, that tells you something about build quality and long-term durability.
Step 15 – Check the Chassis and Structure
Before you get distracted by engines and gadgets:
- Look over the chassis rails:
- Any cracks, bends, or signs of welding repairs?
- Thick layers of muck hiding potential damage?
- A machine caked in mud is harder to read. Clean metal shows:
- Cracks
- Repairs
- Impact damage
If the whole base looks battered, assume the rest of the machine has had a similar life.
Step 16 – Slew Bearing and Grease Nipples
The slew bearing is one of the most critical and expensive components.
- Find the grease nipples around the slew ring.
- Check:
- Are they bone dry and rusty?
- Or is there clearly fresh grease around them?
In the video A buyers guide to second hand cherrypickers, you mention changing slew bearings at £32.5k a time – that’s the kind of bill you must avoid by spotting neglect early.
A dry slew bearing = massive red flag.
Step 17 – Engine Bay: General Condition
Open the engine compartment and ask:
- Does it look maintained or like a compost bin?
- Filters:
- Fuel and oil filters caked in ancient dirt = likely very old.
- Clean filters = someone’s at least touched it with a spanner this decade.
- Oil:
- Pull the dipstick – is the oil pitch black and thick, or reasonably clean?
You can’t diagnose the engine perfectly on sight, but you can absolutely tell whether anyone’s been servicing it.
Step 18 – Engine Mounts, Radiator & Fan
Check:
- Engine mounts:
- Put a hand on the engine and rock it.
- Excessive movement suggests worn mounts, which can lead to fans hitting guards and belts being damaged.
- Radiator:
- Is it clogged with dust, leaves, and muck?
- Blocked radiators lead to overheating and expensive engine issues.
- Check for:
- Broken or missing fan blades
- Signs the fan has been contacting the guard
These are classic signs of vibration and neglect.
Step 19 – Wiring and Electrics
Around the engine and base, look at:
- Looms and connectors:
- Are they neatly clipped, or hanging loose and butchered?
- Any obvious home-made repairs wrapped in insulation tape?
- Corrosion:
- Green/white fuzz on connector pins suggests water ingress.
If the seller swears it’s “never missed a beat” but the wiring looks like someone’s been at it with a bread knife, be suspicious.
Step 20 – Outriggers: General Condition
Now move on to the outriggers:
- Check each leg and ram for:
- Oil leaks on the cylinders
- Bent or twisted legs
- Pads that are:
- Cracked
- Missing
- Worn right through
Drop each leg partially and sight down it – you want them straight, not banana-shaped.
Step 21 – Kingpins, Bushes and Play
With the leg partly down:
- Push up from underneath on the foot.
- Watch the kingpin area:
- Some movement from the ram is normal.
- Movement of the pin in the chassis suggests bush wear.
If bushes are so worn that things are going oval, the machine has not been greased or maintained properly for a long time.
Step 22 – Leg Sensors and Switches
Each outrigger will have some kind of switch/sensor telling the machine the leg is deployed.
Check:
- Are the sensors present, secure and wired?
- Any obvious bypasses / taped-up sensors?
Later, when you operate the machine, make sure:
- The machine refuses to boom up unless the legs are correctly deployed.
- If it does go up with dodgy leg positions, something has been bypassed and that’s a serious safety concern.
Step 23 – Signs of a Tip-Over on the Legs and Power Track
There are classic tell-tales of a machine that’s been over on its side:
- Legs slightly bent or kinked
- Big dents in the boom or power track where the legs have slammed into it in the folded position
- Twin impact marks where folded legs have punched into the machine structure
Some minor scratches = probably just clumsy positioning.
Deep dents = likely rollover or heavy impact.
If a machine shows clear signs of having been over and the seller hasn’t mentioned it, that tells you as much about the seller as the rig.
Step 24 – How to Think About a Machine That Has Rolled Over
A tip-over is not always a deal-breaker if:
- The seller is open about it.
- Major components (e.g. slew bearing, slew bolts, damaged legs, power track) have been:
- Properly replaced
- By the manufacturer or reputable dealer
- Documented and signed off.
If it’s just been stood up and carried on without professional inspection, you’re gambling your safety (and your wallet).
Step 25 – Trailer and Tyres (If Towing)
From the latter part of the video in A buyers guide to second hand cherrypickers, there’s a useful aside on trailers:
- Check trailer tyre load rating and pressure.
- Many heavy plant trailers for spiders want around 90 PSI (always check the sidewall and manufacturer guidance).
- Under-inflated tyres:
- Run hot
- Flex excessively
- Are far more prone to blow-outs
If you’re going through tyres constantly, it may not be “cheap tyres”; it might be wrong pressure.
Step 26 – Booms: Structural Condition
Now move up to the booms:
- Walk the length of each section (what you can see) and look for:
- Dents
- Kinks
- Twists
- Crushed sections, especially on edges and corners
- Remember to look at the top of the boom, not just the sides.
Dents on the boom can cause the telescopic section to rub, jam or wear badly and usually mean very expensive repairs.
Step 27 – Chains and Wire Ropes in the Boom
Inside the telescopic boom you’ll normally find:
- Chains or
- Wire ropes
Check where they attach:
- Are the end fittings secure and not corroded?
- Any visible rust, broken links or damaged wires where they’re exposed?
Then remember:
- Chains often need thorough inspection at specific ages.
- Ropes often need outright replacement at the manufacturer’s specified interval.
Budget accordingly.
Step 28 – Chains/Ropes: Inspection and Replacement Intervals
Typical patterns:
- Chains:
- Periodic inspection (6-monthly LOLER)
- Extra deep inspection at a given machine age (e.g. 10–12 years)
- Ropes:
- Often mandated replacement at e.g. 7, 10 or 12 years – no inspection option.
Some rope jobs can be £3–5k+, and some chain jobs aren’t far behind.
If you’re buying a 7-year-old machine that’s never had its ropes done, treat that cost as inevitable, not optional.
Step 29 – Use Chain/Rope Status as a Negotiation Tool
Example:
- Machine price: £30k
- Ropes due within months: £4–5k
You now have a solid reason to say:
“I’m going to have to do the ropes; that’s a £X bill. Let’s reflect that in the price.”
The video at A buyers guide to second hand cherrypickers makes this point clearly: this is one of the big things buyers regularly forget to factor in.
Step 30 – The Cage/Basket – Aluminium and Expensive
Most spider baskets are aluminium:
- Easier to bend
- Harder and more specialist to weld
- Often thousands of pounds to replace
Check:
- Guardrails:
- No kinks, twists or leaning posts
- Basket floor:
- Not bowed, cracked or full of dubious repairs
- Mounting points:
- No cracks around where the cage attaches to the jib
A scruffy cage can be cosmetic, but it can also be a sign of general abuse.
Step 31 – Ground Function Test: Outriggers and Tracking
Now, with visual checks done, time to actually run it:
- From ground controls:
- Deploy and retract all outriggers
- Auto-level function (if fitted)
- Individual leg control (if available)
- Track forwards and backwards
- Check all speed ranges (slow/fast, or 1–3 if it has three)
- Deploy and retract all outriggers
You’re looking for:
- Smooth operation
- No odd jerks or stalls
- No alarming noises
Step 32 – Boom Function Test from the Ground
Still on base or tethered remote:
- Lift and telescope the boom through its full range.
- Watch:
- Does it move smoothly?
- Any spots where it judders or stops unexpectedly?
- Listen:
- Creaking, groaning, or horrible dry-pin squeaks suggest lack of grease and wear.
Then, if happy, send it all the way to full height and stand back.
Step 33 – Full Height Visual Check
At full height and reach:
- Step back and look at the whole machine:
- Is it leaning more than you’d expect?
- Do any sections look twisted or out of line?
- If anything looks “off” to your eye, it probably is off.
A machine that visibly leans or twists at full height usually has structural issues or badly worn components.
Step 34 – Platform Controls: How Does It Feel to Use?
Now get in the basket:
- Run every function from the cage:
- Up / down / telescope / slew / jib / basket rotate (if fitted)
- Ask:
- Are the controls intuitive?
- Is it responsive or laggy?
- Does it feel like something you want to spend all day working from?
This is where you decide if the machine is not just mechanically sound, but pleasant and safe to operate.
Step 35 – Test with Your Real Working Kit
If the dealer allows (as discussed in A buyers guide to second hand cherrypickers):
- Bring your actual kit:
- Chainsaws and rigging (tree work)
- Buckets, jet wash gear (cleaning)
- Tools and materials (roofing)
- Put it in the basket and:
- Check outreach with your weight + your kit
- Make sure you can physically do the type of work you bought it for
There’s no point in buying a machine that only hits the numbers on paper, but fails with real-world load and positioning.
Step 36 – Stability and Confidence at Height
Up in the air with your kit:
- Does it feel:
- Solid and confidence-inspiring?
- Or vague, wobbly and unnerving?
Confidence is everything when you work at height. A machine that doesn’t feel stable will slow you down and mentally drain you every day.
Step 37 – Seller’s Honesty and Character
Throughout the visit, pay attention to the person, not just the machine:
- Are they open about:
- Past faults
- Repairs
- Incidents like tip-overs?
- Do their answers match what you see on the machine and in the paperwork?
If someone is hiding one thing (e.g. a rollover), what else are they hiding?
Step 38 – LOLER / Thorough Examination Company Stickers
Most machines will have a LOLER inspector’s sticker on them.
- Take the company name and phone number.
- Call them:
- “I’m looking at buying this machine. I see your sticker on it; have you looked after it? Anything significant you can share?”
They won’t give you their internal reports, but they can often confirm whether:
- It’s been seen regularly
- Any big items (slew, ropes, chains) have already been flagged or done
Step 39 – Consider Taking an Engineer or Access Specialist
If you’re investing serious money and you’re not mechanically confident:
- Pay an access engineer or reputable dealer to:
- Come with you, or
- Inspect the machine where it is
Spending a couple of hundred quid can easily save you thousands – or stop you buying a nightmare.
Step 40 – Pull It All Together: The 30-Second Checklist
When you’re stood there in front of the machine, run this in your head:
- Damage – chassis, legs, booms, cage: any cracks, kinks or obvious repairs?
- Hoses – leaks, exposed braiding, rubbing points?
- Engine bay – reasonably clean, filters not ancient, oil not tar?
- Grease – slew bearing and pins visibly greased, not bone dry?
- Tracks – good tread, correct tension, expanding function moves freely, brackets not bent?
- Outriggers – rams dry, legs straight, no rollover dents against the boom or power track?
- Booms – no dents or twists (including on top), chains/ropes secure and not corroded?
- Cage – straight, solid, no major structural damage?
- History – recent LOLER, some service records, clarity on ropes/chains/slew work?
- Functions – everything works from ground and cage, goes up straight, feels stable?
If you want a visual companion to this checklist, re-watch the demonstration in A buyers guide to second hand cherrypickers while you’re going through each point.
Step 41 – Final Advice: Don’t Rush, Don’t Guess
To wrap up:
- Don’t buy blind from photos. Always see it working in the flesh.
- Don’t be afraid to walk away – there will always be another machine.
- Use:
- This written guide
- The full walk-through in A buyers guide to second hand cherrypickers
- Plus advice from dealers / engineers
…to make a calm, informed decision.
Follow Me Online:
• 🌐 Website: https://www.dji-uk.co.uk/
• 🎥 YouTube: https://www.youtube.com/@dan_cherrypicker_man
• 🎵 TikTok: https://www.tiktok.com/@dan_cherrypicker_man
• 📸 Instagram: https://www.instagram.com/dan_cherrypicker_man/
• 👍 Facebook: https://www.facebook.com/dancherrypickerman
• ✖️ X: https://x.com/Dan_Picker_Man
• 💼 LinkedIn: https://www.linkedin.com/in/danny-iwanejko-18574265/
• 📍 Google Business Listing: https://share.google/qIIEsiPzauZxfepNd
• 🛠️ Amazon Shop: https://www.amazon.co.uk/shop/danthecherrypickerman?ref_=cm_sw_r_cp_ud_aipsfshop_ZC955R0FD1Q8D1FCJASP
And a huge thank-you to Elite Access Repairs LTD and Tom Heathman for their time, insight and help putting this guide (and the accompanying video) together.
Website: https://eliteaccessrepairs.co.uk
Facebook: https://www.facebook.com/Eliteaccessrepairs
Instagram: https://www.instagram.com/eliteaccessrepairs
And finally, a big thank-you to Granite Workwear for keeping me dry and warm throughout the filming, even when the rain started blowing sideways into the barn we were stood in. Top-quality kit that never lets me down.
Workwear sponsored by Granite Workwear – https://www.graniteworkwear.com/